Building a Better Wicking Bed
A cheap and low-maintenance garden bed for vegetables

Last year, I hastily assembled a basic wicking bed in my garden, mostly using scraps of stuff I already had lying about. I think my biggest investments were a length of slotted agricultural drainage pipe and a couple of bags of sand.
If you’re stumbling across this article without any idea of what a wicking bed is or does, the executive summary is it’s a raised garden bed with a built-in reservoir that keeps the soil moist without direct watering. You might want to read up on the concept first, or just type the term into your favourite search engine for a multitude of resources.
What worked, what didn’t?
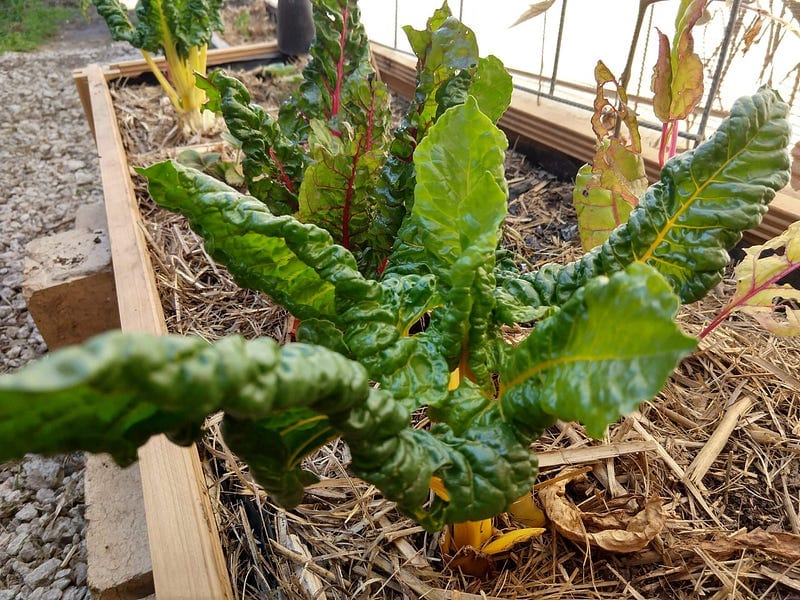
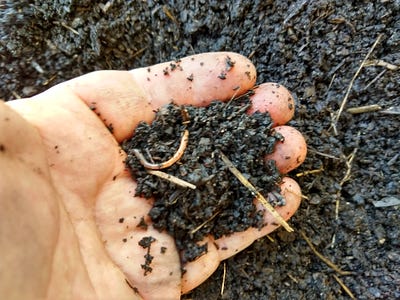
First up — the original bed provided a good habitat for a thriving worm colony. Over a few weeks, I just threw the occasional worm in there as I found them when working in the garden, no more than a dozen all up. When I dismantled it a year later there was scarcely a single handful of soil that didn’t have a healthy, fat worm or two in it.
That said though, my drainage point was way too high up and a good amount of the soil was waterlogged and full of rotting matter — it smelled awful. The worms could have had a lot more room to move around and live if I’d got that part right.
The main thing I screwed up was not properly fitting the plastic liner. I roughly folded my huge sheet of plastic to fit the area, not wanting to cut it and later wish that I hadn’t. This led to massive weird scrunched up sections around the edges which provided a daytime haven and perfect breeding ground for snails. My beans were totally eaten down to nothing before I worked out what was going on. I never got ahead of this problem and only a few things survived. My tomatoes did pretty well, I guess the snails just weren’t into them.
Other than that, the mechanism of the bed worked and right through summer the soil layer was moist and healthy. I didn’t even have to top up the reservoir as the occasional rainfalls were sufficient to keep it at a working level.
New and improved design
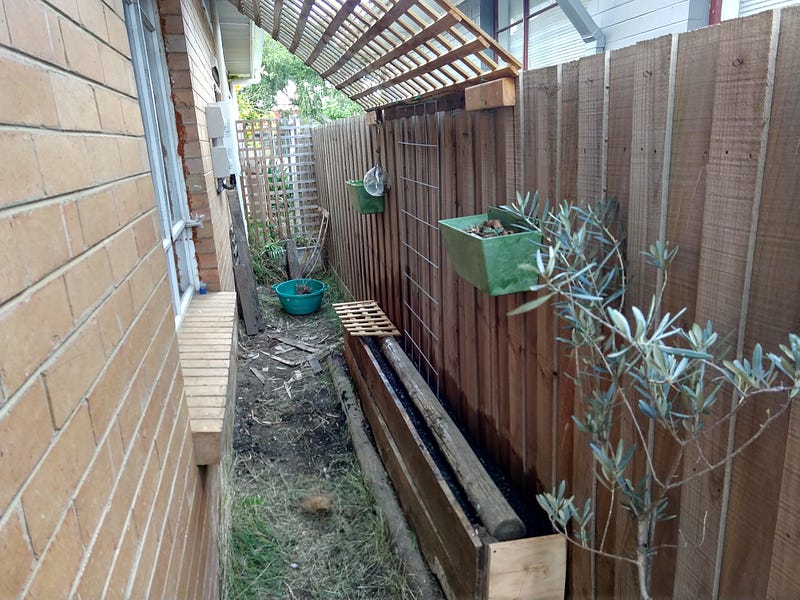
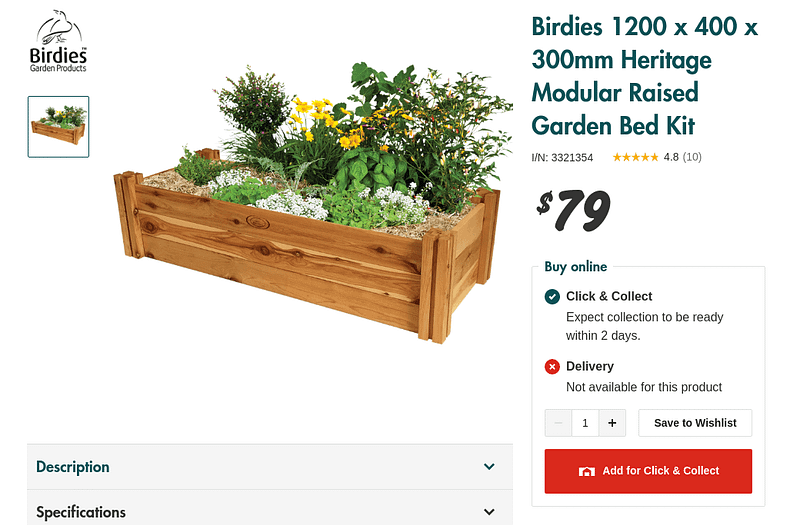
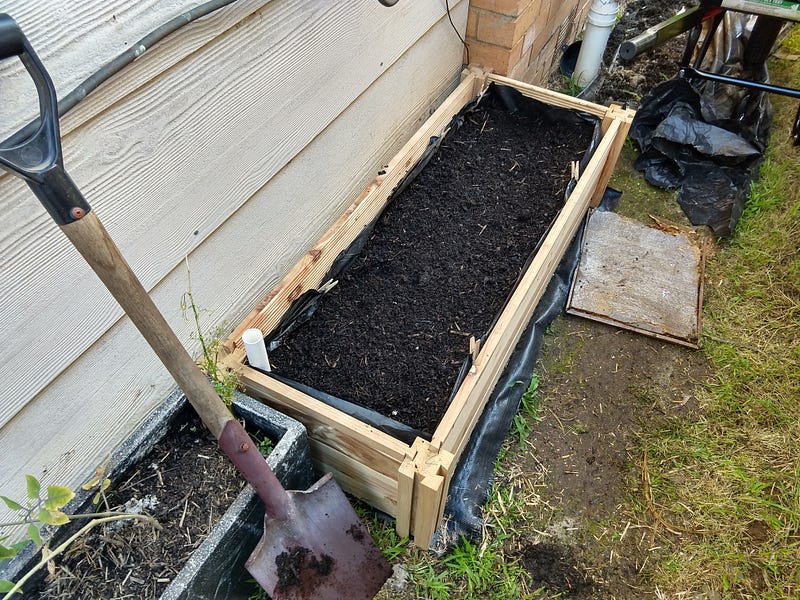
I started my plans for the new version thinking I was going to build the bed framework from scratch, but what with lockdowns and general chaos it wasn’t as practical as I’d hoped to spend a couple of hours wandering around Bunnings looking at timber and having a bit of a think. In the end, I just bought a simple pre-made garden bed kit to use as the base. It cost more than I’d really wanted to spend on this part, but I can’t deny it saved me a lot of time.
From the previous bed, when I broke it down I recovered the plastic sheet (just cheap builder’s plastic sheet, not pond liner), the slotted drainage pipe, the PVC fill pipe and a large quantity of the sand. Most of the soil (and the worm colony) was also put aside for re-use although I did just dump the most waterlogged and swampy layer that’d been sitting in standing water for a year down the bottom of the garden. There are some nasturtiums growing in it now and they’re having a great time.
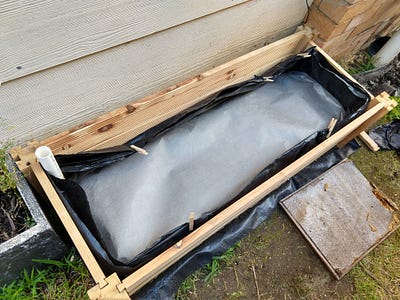
Building the reservoir
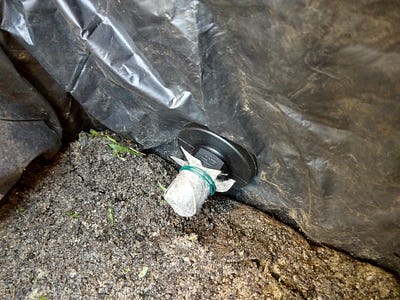
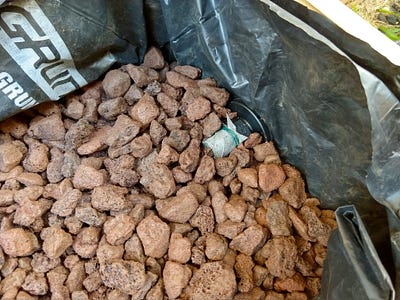
Aside from the frame, I bought a few new things to replace some of the critical pieces that I’d largely improvised from items on hand last time. A proper outlet for the drainage was important, as was some decent quality geotextile fabric to separate my soil layer from the reservoir. I also got some scoria for the wicking layer instead of just using sand. I did reuse the sand from the previous build at the very bottom, as it was very good for holding the drainage pipe in place while setting things.
The inner plastic layer contains the slotted drainage pipe, which is held in place by lightly-packed sand. The scoria covers this, up to the level of the top of the outlet pipe. I put a small piece of geotextile fabric over the outlet and secured it with a cable tie to act as a filter so no solids get into the pipe.


Also reused from the old bed was a short length of PVC pipe that allows water to be poured directly into the bottom reservoir layer. It’s cut at a 45 degree angle at the bottom and just placed near the end of the drainage hose. It doesn’t need to be very precise. You could mess around with elbow joints but if it’s getting into the right area, it’s fine. The pipe will even out the distribution and it’ll soak the sand through.
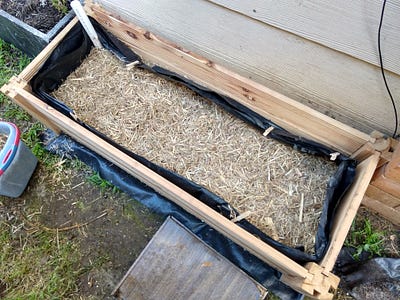
The soil layer
The top half of the bed is much more straightforward. The geotextile layer separates the rock layer from the soil, allowing moisture to pass in both directions (down when it rains, up when it’s warm) without organic matter getting into the water and rotting. I just put in a light layer of some sugarcane mulch over that, then added the soil which was entirely reclaimed stuff from the previous bed, and of course included a multitude of healthy worms.
Then all that really remains is to add water and test that it’s properly contained. If you’re more sensible than me, you’d do this before adding any of the soil. I’m not more sensible than me, but I got lucky and everything went perfectly.
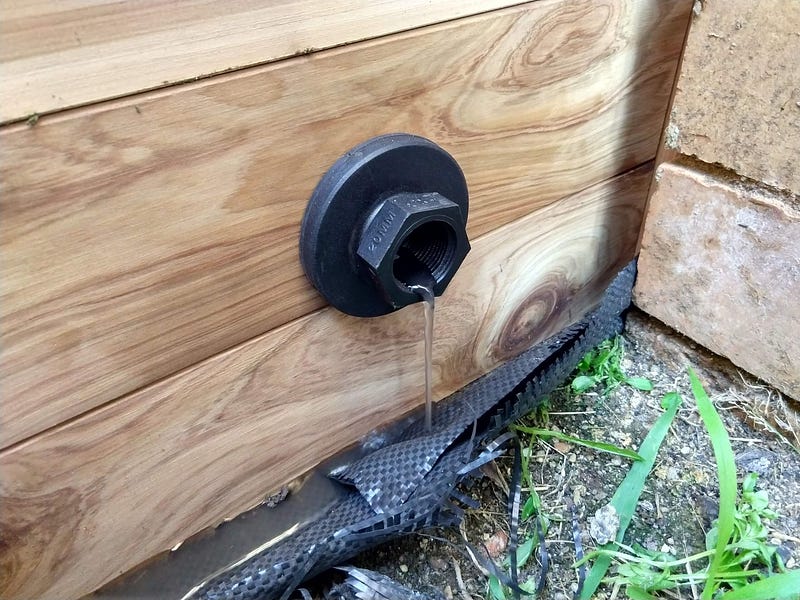
Using a standard threaded fitting like I did gives you a huge amount of options for diverting, controlling and even reclaiming water that overflows from the system using easily obtained hose fittings. You could also link a couple of beds together and share a common reservoir between them.
Did it work?
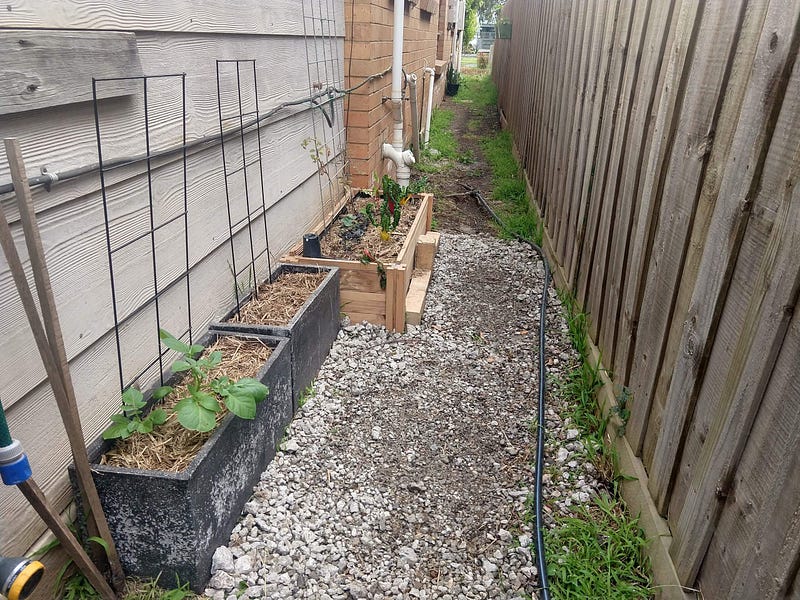
It’s now been about six weeks since the initial setup, and by all measures it seems to be going well. The soil has maintained a good level of moisture, although it’s been raining quite a lot. The big test will come in a month or so as the weather gets warmer and warmer. I have some happy, healthy plants in there now that I’ve transplanted from some non-wicking beds around the garden, and a few tomato seedlings almost ready to move in.
Once again, I have a snail and slug problem however. I’m still looking for a good solution to that, other than not growing beans which seem to be the food of choice around here. I may have to move to a greenhouse solution if I can’t discourage them somehow, as I really don’t want to start using baits or pesticides. I love beans, and I want to grow them, but it’s an uphill battle to get anything past a tiny seedling right now.
How much did it cost?
All up, I spent a little over AU$100 this year on new things that I didn’t reuse from the last build. All up the budget for the first bed and this one has been around AU$150, but I have enough spare drainage pipe and fabric for another bed or two in that. The single most expensive part was the raised garden bed kit that cost AU$76, and if you’ve got the time and tools building your own could cut most of that cost out.
I used a cheap sheet of builder’s plastic to line my bed, and it’s been fine but you might want to consider proper pond liner sheets. It’s a pretty crucial component and if it gets a hole in it you’re pretty much going to need to break the whole thing down and start again.
As for what’s in there … scoria is cheap, sand is surprisingly more expensive than I thought it would be (but I live near a beach and have trouble seeing it as valuable) and I just used the cheapest available potting mix blends to bulk it out. You could skip the sand and just use scoria. I probably would next time, but I already had the sand so in it went.
I didn’t skimp on the drainage fitting or the geotextile, but that’s only about AU$12 for each and there’s enough fabric on the roll for a couple more installations and that outlet will last for years and years.
I think without much effort and some careful shopping you could easily do this for under a hundred bucks, if you build the bed frame from scratch. Pre-made wicking bed kits can go for well over $300.
Future plans
The next step I want to try is adding a small rainwater tank and setting up a system to monitor the reservoir level and top it up as required. Overkill? Sure, for this, but I’d like to scale this operation up massively at some point and having figured out that side of things will be a huge help at that point.
Reclaiming the overflow would be good, but might be more trouble than it’s worth, given it’s so low off the ground I’d only be able to divert it downhill or have to use a pump and there’d only be anything coming out during heavy rainfall — so it’s probably a better use of my time to just divert the gutters into a tank.
Thanks for reading through this, if you’ve got questions hit me up via my Chinwag account. I’m happy to go on about this stuff any time.
Originally published at https://bremensaki.com on October 14, 2020.